Sunday, December 25, 2016

Installation and Usage of Sass on Windows

  1. Download the Ruby installer from:
    http://rubyinstaller.org/downloads/— Look for the version with x64 on it. Be sure the Ruby installer is version is 1.9x. SASS doesn't work on 2.x versions.
  2. Open the Command Line (CMD) by pressing the Windows Key + R and type: CMD, then press Enter.

  3. Type the following command in the CMD:
    gem install sass


    It will take a few seconds to install SASS. At the end you will see this in CMD.

    That's it! SASS is now installed on your machine.
      Procedure to use SASS
  1. Create a Demo folder anywhere on your PC.

  2. Inside that folder create the two sub folders /css and /scss.

  3. Create a .scss file.

    Go into the /scss folder and create a file called: demo-styles.scss.


    Notice the file extension .scss. This is your SASS file.
  4. Return to the CMD line. In CMD you need to go to the Demo Folder as in the following:
       Return to the CMD line. 
       
       In CMD you need to go to the Demo Folder as in the following:
 
  Make SASS “watch” to your /scss and /css folders.


    6. Edit the .scss file and watch SASS compile it into a .css file.
        
    Make SASS “watch” to your /scss and /css folders.


   7. Edit the .scss file and watch SASS compile it into a .css file. 
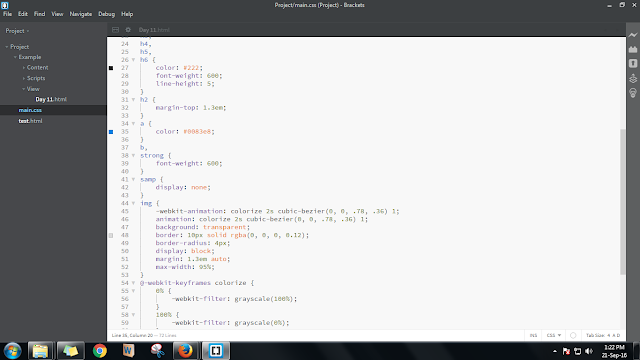
  
Updated CSS File


Included 'reset.scss' File in demo-styles.scss


You have now leveled up by knowing how to use SASS.

Demo Example

Happy Coding Guys!


Monday, December 12, 2016

Media Queries For Mobile, Laptop, Desktop And iPad For Making Responsive Website Design (RWD)

Media Query

Media query is a CSS technique introduced in CSS3.

It uses the @media rule to include a block of CSS properties only if a certain condition is true.
Media queries enable us to create a responsive website design (RWD) where specific styles are applied to small screens, large screens and anywhere in between. The media query syntax allows for the creation of rules that can be applied depending on device characteristics.

General Syntax of Media Query

@media (query) {
   /* CSS Rules used when query matches */
}


While there are several different items we can query on, the ones used most often for responsive web design are min-width, max-width, min-height and max-height.

Let's have a look at device specific queries:

1. Mobile
There are two different resolution for laptops.
  1. /* For 480 Resolution */  
  2. @media only screen   
  3. and (min-device-width : 320px)   
  4. and (max-device-width : 480px)  
  5. /* STYLES GO HERE */}  
resolution  

Generally, this dimension is recommended for mobile:
  1. /* For 640 Resolution */  
  2. @media only screen   
  3. and (min-device-width : 360px)   
  4. and (max-device-width : 640px)  
  5. /* STYLES GO HERE */}  
mobile

2. Laptop
There are two different resolution for laptops.
  1. /* For 1024 Resolution */  
  2. @media only screen   
  3. and (min-device-width : 768px)   
  4. and (max-device-width : 1024px)  
  5. /* STYLES GO HERE */}  
Program
  1. /* For 1366 Resolution */  
  2. @media only screen   
  3. and (min-width: 1030px)   
  4. and (max-width: 1366px)  
  5. /* STYLES GO HERE */}  
Code

Generally, this dimension is recommended for laptop,
3. Desktop
  1. @media only screen   
  2. and (min-width: 1370px)  
  3. and (max-width: 1605px)  
  4. /* STYLES GO HERE */}  
STYLES  

4. iPad
  1. /* If you're looking to supply different graphics or choose different typography for the lower resolution iPad display, the media queries below will work. */  
  2. /* Orientation : Landscape */  
  3. @media only screen   
  4. and (orientation : landscape)   
  5. and (-webkit-min-device-pixel-ratio: 1)  
  6. and (min-device-width : 768px)   
  7. and (max-device-width : 1024px)   
  8. /* STYLES GO HERE */}  

  1. /* Orientation : Portrait */  
  2. @media only screen   
  3. and (orientation : portrait)   
  4. and (-webkit-min-device-pixel-ratio: 1)   
  5. and (min-device-width : 768px)   
  6. and (max-device-width : 1024px)  
  7. /* STYLES GO HERE */}  


I have attached sample .css file in this article. Guys, keep exploring. If you have any queries, please feel free to contact me.

Sample CSS File

Thursday, November 24, 2016

Best Practices to Make Your Site Responsive (RWD)

In a current era, Responsive Website Design must require to develop your site. If you are making a site which can be easily open at desktops, laptops, I pads, Mobiles and etc. In short, your site is clearly visible with all digital devices.
For achieving that purpose, you have to create your site responsive. Means, it covers all different dimensions of all different devices.

Best Practice to make Responsive Website Design (RWD):
  • Give "width, padding-left, padding-right, margin-left, margin-right" in percentages (%).Because whenever you try to reduce or expand the width of screen, these Css properties are automatically updated.
  • Don't give "width, padding-left, padding-right, margin-left, margin-right" in pixels because it contains static values. It may not get changed when you try to shrink or expand your page.
  • Always check compatibility of your page in Mozilla Firefox, Google Chrome, Safari, Opera ,IE 9 as well as above versions.
  •  Don't nest block level elements into inline elements Eg. <span><div></div></span>. It violates the standards of HTML.
  • Use proper coding conventions and rules for HTML and Css to develop a page.
  • Study Best Practices for HTML and Css before starting to make a page.
  • Always make HTML first. After making HTML, write Css for making RWD.
  • If you are using any framework like Bootstrap, always look after for coding standards of HTML and Css. Because in most of cases, Bootstrap violates coding standards.
  • Whenever you are creating your site, give most of the values of Css properties in percentages (%).So that it will complete your 80% task for making RWD.
  • For remaining 20% work, if your page is not fit for a particular dimension, use media query for that dimension only.
  • Try to avoid device specific hacks as well as use of media queries.
  • Give size of each elements (Without using hacks and media queries) in such a way that your page should visible in each dimensions.
  • Use HTML and Css Validator Plug-in to validate your code.
  •  Make minified version of Css before deploying your code on production. Use Css Compressor for making Css minified. 
  •  Avoid/stop use of "important" in Css.   

It's not still finished. But you can get at least basic idea about how to implement Responsive Website Design (RWD).

Guys, Keep Exploring. If you have any query, please feel free to contact me.

Sunday, November 13, 2016

Atom (Open Source - Text Editor) Auto Indentation


Atom is an Open Source Text Editor. It supports couple of languages like Html, C#, Python, PHP, JavaScript and etc.  
I would like to share how to perform Auto Indentation in Atom.

Step 1:

Open File- Init Script - Paste below code

atom.workspace.observeTextEditors (editor) ->
  editor.buffer.onWillSave ->
    return if editor?.getGrammar()?.scopeName is 'source.coffee'
    editor.autoIndentBufferRows 0, editor.getBuffer().getLineCount() - 1

Step 2: 

Open File- Key map - Paste below code

'atom-text-editor':
  'ctrl-alt-l': 'editor:auto-indent'

Once you finish with both the steps, please restart your Atom. 
Now whenever you write some code and press “Ctrl + S" key, your code will be auto indented. 

Happy coding...!! 


Tuesday, November 1, 2016

Atom (Open Source) - A hackable text editor for 21st Century


Atom is a free and open-source text and source code editor for OS X, Linux, and Windows. It provides support for plug-ins written in Node.js, and embedded Git Control, developed by GitHub.

You can visit official site of Atom on below link:


You can easily download Atom from below link. It’s Open Source Text Editor.

1. Cross Platform Editing
Atom can work on any OS like Windows, Linux or OS X.

2. Built In Package Manager
You can search and install new packages. Even you can create your own.

3. Auto completion
Atom automatically completes your code once you write starting character or a word.

4. File System Browser
You can easily browse single file, multiple files or even whole project at a time.

5. Grammar Selection
You can set grammar selection according to file type so that proper color identification and intelligence can get from Atom.


Atom is a desktop application built using web technologies like HTML, CSS, Javascript and Node.Js. Atom is based on Electron (formerly known as Atom Shell), a framework.

Atom also enables cross-platform desktop applications using Chromium and io.js, which is also developed by GitHub. It is written in Less and CoffeeScript. 

Atom can also be used as an IDE. Atom was released from beta, as version 1.0, on June 25, 2015.Its developers call it a "hackable text editor for the 21st Century".


Saturday, October 1, 2016

Widely Used Plugins/Extensions of Brackets

Bracket is a modern, open source text editor that understands web design. It's a lightweight, powerful and modern text editor. They blend visual tools into the editor so we get the right amount of help when we want it. For Example: Photoshop.

With focused visual tools and preprocessor support, Brackets is a modern text editor that makes it easy to design in the browser. It's useful for web designers and front-end developers.

Brackets Screen:


The best feature of this application is to preview your live code changes on the browser with a single click. In this application, there is a button named ‘Live Preview”, which is used to view the live changes on browser by single click on this button. Even it provides better intelligence for HTML tags, CSS, JavaScript, j Query and many other framework. It also provide auto feature for code indentation, alignment, syntax error highlighting etc. There are n number of plugins available in the market which is easily plug-in and help the developers to code it with an ease.
 
Widely Used Plugins/Extensions of Brackets 

 * Angular Js Code Hints  

It provides hint for Angular JS elements like ng-include, ng-view and attributes such as ng-class, ng-controller, ng-app. You can download it from https://github.com/sirajc/Brackets-AngularJS-CodeHints/


 * Auto Brackets

When you write { , [ or ( and press enter, closes the tag and leaves the cursor in the middle line with correct indentation.You can download this extension from https://github.com/beldar/Auto-Brackets

* Auto Prefixer

It automatically adds vendor prefixes in the Css when necessary.The automatic mode is used by toggling "Auto prefix on save" on in the Edit menu.This will process the whole file each time the document is saved and add and/or remove vendor prefixes where appropriate.For more control over where prefixes are added and removed a piece of code may be selected and processed by clicking "Auto prefix selection" in the Edit menu.Only the selected part of the document will be processed.You can download it from https://github.com/mikaeljorhult/brackets-autoprefixer

* Auto save Files on Window Blur

Auto save all open files when switching away from the Brackets editor, in the style of PHPStorm/WebStorm.You can download it from https://github.com/martypenner/brackets-autosave-files-on-window-blur

 * Beautify

Brackets Beautify can be run manually on the whole file or on a selection. Use the Toolbar Button with the wand icon, the menu entry Edit > Beautify, the context-menu entry Beautify, or one of the keyboard shortcuts Ctrl-Alt-B (Windows/Linux), Ctrl-Shift-L (Windows), Cmd-Shift-L (Mac), or define your own. Alternatively it can be enabled to run automatically on save. Use the menu entry Edit > Beautify on Save or the more advanced settings to activate.You can download it from https://github.com/brackets-beautify/brackets-beautify

* CSS Color Preview 

It previews the colors within CSS file.You can toggle the enabled of this extension from the view menu.You can download it from https://github.com/cmgddd/Brackets-css-color-preview 


* Detect Indentation

Brackets Extension to detect the indentation used in the current file and set your editor settings accordingly.You can download it from https://github.com/hirse/brackets-detect-indentation

* Brackets Snippets (by edc)

You can add customize snippets to your Brackets Editor.Even you can use Snippet Library to find awesome snippets.

Snippet Manager


Snippet Library


 You can download it from https://github.com/chuyik/brackets-snippets

* Working File Tabs  

Enable working files list in Sidebar to show as tabs.


You can download it from https://github.com/demonmhon/brackets-working-file-tabs

* Duplicate Files and Folders

An extension for Brackets that provides the duplicate functionality to duplicate files and folders in the project view.

Duplicate - Right click on a file or folder in the project view and select "Duplicate" from the context menu.

Copy or Move - Right click on a file or folder and select "Mark" to mark the file/folder to be copied or moved. Then right click on a file or folder at your desired destination and then select "Move to Here" or "Copy to Here". You can download it from https://github.com/torinpascal/brackets-duplicate-extension

* Extract For Brackets (Preview) 

Preview of Extract functionality inside Brackets. Extract design information and assets from a design comp via contextual code hints for CSS. 

 * FuncDocr

A brackets extension to generate JS/PHP Documentation for your functions. 
  • Open a JS or PHP file
  • set your cursor on a function declaration 
    • function cool(stuff)
  • Use the ShortCut Ctrl-Alt-D (Win) or Ctrl-Shift-D (Mac) to start the documentation or /** + Enter


You can download it from https://github.com/wikunia/brackets-funcdocr 


* Indent Guides 

A Brackets extension to show indent guides in the code editor.Toggle the extension with View > Indent Guides. 


 You can download it from https://github.com/lkcampbell/brackets-indent-guides 

* More HTML Code Hints

Extends HTML code hints with more HTML5 elements and attributes such as picture, srcset, inputmode as well as HTML4 elements such as cellpadding, cellspacing and iframe. You can download it from https://github.com/coliff/Brackets-HTML5CodeHints/

* Paste and Indent 

Automatically apply the correct indentation to pasted text. You can download it from https://github.com/ahuth/brackets-paste-and-indent 

* Reasonable Comments 

Simple enhancements for typing block comments in Brackets. When you press Enter, the next line is automatically prefixed with a properly indented "*". You can download it from https://github.com/peterflynn/reasonable-comments

Whitespace Normalizer

It trims trailing white spaces, transforms tabs to spaces and ensures newline at file end. You can download it from https://github.com/dsbonev/whitespace-normalizer

* Sftp Upload

Steps to Upload a File:

  • Open Extension Manager by clicking the building-block icon on the right side of Brackets;
  • Search for sftpupload;
  • Click Install;
  • Click the up-side arrow icon (on the right) to open the panel;
  • Navigate to your project, click "Server Setup" button and fill in your server info;


Now you can right-click on the files in your project, use Upload via SFTP to upload it to your server
  • If you change and save a file within the project, it will show up in the bottom panel; you can click "Upload" to upload this file, "Skip" to skip a single file, or "Upload All" to upload all changed files to the server.
  • Shortcuts:
    • (Ctrl-Alt-U / Cmd-Alt-U) to upload the current opening file;
    • (Ctrl-Shift-U / Cmd-Shift-U) to upload all changed files;
    • (Ctrl-Alt-Shift-U / Cmd-Alt-Shift-U) to open up Upload panel.
 Now you have got better knowledge about various extensions of Brackets.

Happy learning....!!