Gulp is a JavaScript task runner that enables automation and crunching of monotonous tasks all in one swoop. In a modern workflow, there is probably a host of tools that you're using in development and production. Some of the more popular ones are script concatenation and minification, and Sass compilation.

It's often used to do front end tasks like:
· Spinning up a web server
· Reloading the browser automatically whenever a file is saved
· Using preprocessors like Sass or LESS
· Optimizing assets like CSS, JavaScript, and images
· Gulp runs much, much faster. Tasks get crunched quicker, and the time you spend between writing code and seeing the changes in the browser is significantly less.
The first step to using Gulp is to require it in the gulp file.
var gulp = require('gulp');
The require statement tells Node to look into the node_modules folder for a package named gulp Once the package is found, we assign its contents to the variable gulp.
The basic syntax of a gulp task is:
gulp.task('task-name',function(){
});
});
task-name refers to the name of the task, which would be used whenever you want to run a task in Gulp.
Now, Let's create some variables and assign meaningful values to them.
var paths = {uisource: "UI", // Development Environment
builddestination: "Build", //Build/Deployment Server
};
};
We store folder names to the variables. So later when I want to change the name of the folder, I will have to change the values of var paths {} instead of doing change in the whole gulp file.
Let's move on to create a Project.
You need to have Node.js (Node) installed onto your computer before you can install Gulp.
If you do not have Node installed already, you can get it by downloading the package installer from Node's website.
When you're done with installing Node, you can install Gulp by using the following command on the command line:
npm install --save-dev-g gulp
The -g flag in this command tells npm to install Gulp globally onto your computer, which allows you to use the gulp command anywhere on your system.
If you check the project folder when the command has finished executing, you should see that Gulp has created a node_modules folder. You should also see a gulp folder within node_modules.
When you're done with installing Gulp, you can create the package.json file by using the following command on the command line:
npm init
A package.json file contains metadata about your app or module. Most importantly, it includes the list of dependencies to install from npm when running "npm install" command. If you're familiar with Ruby, it's similar to a Gemfile.
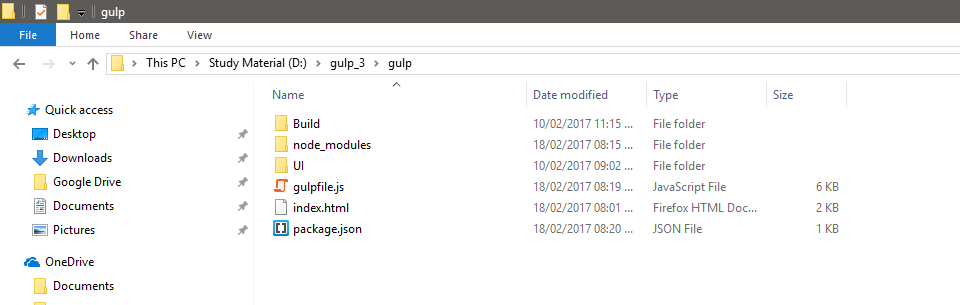
Gulp is flexible enough to work with any folder structure.
For this article, we will use the following structure.
|- gulp/
|- Build/
|- content/
|- fonts/
|- images/
|- js
|- UI/
|- content/
|- fonts/
|- images/
|- js
|- html
|- scss
|- content/
|- fonts/
|- images/
|- js
|- UI/
|- content/
|- fonts/
|- images/
|- js
|- html
|- scss
|- index.html
|- gulpfile.js
|- node_modules
|- package.json
|- gulpfile.js
|- node_modules
|- package.json
Now let’s create the first task of connecting to Build/Deployment Server.
We import gulp-connect Plugin which is used to run a web server (with Livereload).
gulp.task('connect', function () {
console.log("Connect to the Server");
connect.server({
root: ".",
port: 8888,
livereload: true
});
})
console.log("Connect to the Server");
connect.server({
root: ".",
port: 8888,
livereload: true
});
})
Now we'll create another task of opening files and URLs on Build/Deployment Server.
We import gulp-open Plugin to achieve this task.
gulp.task('open', function () {
console.log("Open index.html on Localhost");
gulp.src('index.html')
.pipe(open({
uri: 'http://localhost:8888/'
}));
})
console.log("Open index.html on Localhost");
gulp.src('index.html')
.pipe(open({
uri: 'http://localhost:8888/'
}));
})
Now let’s create a task of moving HTML from Development Environment to Build/Deployment Server.
We import gulp-inject and gulp-inject-reload Plugin which is used to inject file references into your index.html.
gulp.task("movehtml", () => {
console.log("Moving HTMLs to Build/Production Server With Auto Injecting CSS and Js files");
var userScripts = pipes.devGetAndCopyValidatedUserScripts();
var userCss = pipes.devGetAndCopyValidatedCss();
return gulp.src(paths.uisource + '/html/*.{html,htm}')
.pipe(inject(userScripts, {
relative: true,
name: 'bower'
}))
.pipe(inject(userCss, {
relative: true,
name: 'inject'
}))
.pipe(injectReload())
.pipe(gulp.dest('.'))
.pipe(connect.reload());
})
pipes.devGetAndCopyValidatedUserScripts = () => {
return gulp.src([paths.builddestination + '/js/*.min.js']);
}
pipes.devGetAndCopyValidatedCss = () => {
return gulp.src([paths.builddestination + '/content/*.min.css']);
}
Now we'll create another task of moving CSS from Development Environment to Build/Deployment Server.
We import gulp-cssmin Plugin which is used to minify CSS files.
gulp.task('minifycss', function () {
console.log("Minify Css files");
return gulp.src(paths.uisource + '/content/*.css')
.pipe(cssmin())
.pipe(rename({
suffix: '.min'
}))
.pipe(gulp.dest(paths.builddestination + '/content/'))
.pipe(connect.reload());
})
console.log("Minify Css files");
return gulp.src(paths.uisource + '/content/*.css')
.pipe(cssmin())
.pipe(rename({
suffix: '.min'
}))
.pipe(gulp.dest(paths.builddestination + '/content/'))
.pipe(connect.reload());
})
Then, will create another task of moving Js from Development Environment to Build/Deployment Server.
We import gulp-uglify Plugin which is used to minify files.
gulp.task('minifyjs', function () {
console.log("Minify Js files");
return gulp.src(paths.uisource + '/js/*.js')
.pipe(gulpIf('*.js', uglify()))
.pipe(rename({
suffix: '.min'
}))
.pipe(gulp.dest(paths.builddestination + '/js/'))
.pipe(connect.reload());
})
Let's move our fonts from Development Environment to Build/Deployment Server. Generally we use pipe symbol “|” for “or" conditions.
gulp.task('movefont', function () {
console.log("Moving all fonts in Fonts folder");
return gulp.src(paths.uisource + '/fonts/*.+(ttf|ttc|pfb|pfm|otf|eot|svg|woff|woff2|pfa|afm|dfont)')
.pipe(gulp.dest(paths.builddestination + '/fonts/'))
.pipe(connect.reload());
})
return gulp.src(paths.uisource + '/fonts/*.+(ttf|ttc|pfb|pfm|otf|eot|svg|woff|woff2|pfa|afm|dfont)')
.pipe(gulp.dest(paths.builddestination + '/fonts/'))
.pipe(connect.reload());
})
Let's move our Images from Development Environment to Build/Deployment Server.
We import gulp-imagemin Plugin which is used to minify PNG, JPEG, GIF and SVG images.
gulp.task('optimizeimage', function () {
console.log("Optimize Image files");
return gulp.src(paths.uisource + '/images/*.+(png|jpg|jpeg|gif|svg)')
// Caching images that ran through imagemin
.pipe(cache(imagemin({
interlaced: true
})))
.pipe(gulp.dest(paths.builddestination + '/images/'))
.pipe(connect.reload());
})
console.log("Optimize Image files");
return gulp.src(paths.uisource + '/images/*.+(png|jpg|jpeg|gif|svg)')
// Caching images that ran through imagemin
.pipe(cache(imagemin({
interlaced: true
})))
.pipe(gulp.dest(paths.builddestination + '/images/'))
.pipe(connect.reload());
})
Now create a task which converts Sass files to CSS files and moves CSS files from Development Environment to Build/Deployment Server.
For this task, we require a couple of Plugins like gulp-sass, gulp-rename, gulp-autoprefixer and gulp-sourcemaps.
Autoprefixer parses CSS files and adds vendor prefixes to CSS rules.Gulp sourcemaps will interpolate between transformations. So that you keep track of every change that happened.
gulp.task('sass', function () {
console.log("Convert Sass to CSS files");
return gulp.src(paths.uisource + '/scss/*.scss') // Gets the styles.scss file
.pipe(sourcemaps.init()) // Initialize sourcemap plugin
.pipe(sass()) // Passes it through a gulp-sass task
.pipe(autoprefixer()) // Passes it through gulp-autoprefixer
.pipe(sourcemaps.write()) // Writing sourcemaps
.pipe(gulp.dest(paths.uisource + '/content/')) // Outputs it in the content folder
.pipe(cssmin())
.pipe(rename({
suffix: '.min'
}))
.pipe(gulp.dest(paths.builddestination + '/content/'))
.pipe(connect.reload());
})
Now create a task for Deleting Files from Development Environment. Generally, this task runs at the very first stage, before creating a new build.
We import del Plugin which is used to delete files and folders.
gulp.task('delete', function () {
console.log("Delete files");
return del.sync(paths.uisource + '/*.+(ttf|ttc|pfb|pfm|otf|eot|svg|woff|woff2|pfa|afm|dfont|html|htm|css|js|png|gif|jpg|jpeg|svg)')
})
gulp.task('delete', function () {
console.log("Delete files");
return del.sync(paths.uisource + '/*.+(ttf|ttc|pfb|pfm|otf|eot|svg|woff|woff2|pfa|afm|dfont|html|htm|css|js|png|gif|jpg|jpeg|svg)')
})
Create a task for clearing all Cache from Local Machine. We import gulp-cache Plugin to perform this task.
gulp.task('clearcache', function (callback) {
console.log("Clearing all Cache from Local Machine");
return cache.clearAll(callback)
console.log("Clearing all Cache from Local Machine");
return cache.clearAll(callback)
})
Create a task for watching the changes in the files. Watch method is used to monitor your source files. When any changes to the source file are made, the watch will run an appropriate task.
The basic syntax of a gulp.watch() method is:
gulp.watch(Path of Source File', ['Task to be Run']);
We import gulp-watch Plugin to perform this task.
gulp.task('watch', function () {
console.log("Watch for Changes");
gulp.watch(paths.uisource + '/html/index.html', ['movehtml']);
gulp.watch(paths.uisource + '/content/*.css', ['minifycss']);
gulp.watch(paths.uisource + '/scss/*.scss', ['sass']);
gulp.watch(paths.uisource + '/js/*.js', ['minifyjs']);
gulp.watch(paths.uisource + '/fonts/*.+(ttf|ttc|pfb|pfm|otf|eot|svg|woff|woff2|pfa|afm|dfont)', ['movefont']);
gulp.watch(paths.uisource + '/images/*.+(png|jpg|jpeg|gif|svg)', ['optimizeimage']);
})
Create the last task which runs a sequence of gulp tasks in the specified order.
We import run-sequence Plugin to perform this task.
gulp.task('default', function () {
runSequence(['delete', 'clearcache', 'minifyjs', 'minifycss', 'optimizeimage', 'movefont', 'movehtml', 'connect', 'open', 'watch'])
})
It's default task of gulp.When you fire a command from cmd (Command Prompt) as "gulp" then this task will run.
Now our whole gulp file is ready to run....
var gulp = require('gulp');
var watch = require('gulp-watch');
var sass = require('gulp-sass');
var uglify = require('gulp-uglify');
var gulpIf = require('gulp-if');
var imagemin = require('gulp-imagemin');
var cache = require('gulp-cache');
var del = require('del');
var runSequence = require('run-sequence');
var cssmin = require('gulp-cssmin');
var rename = require('gulp-rename');
var inject = require("gulp-inject");
var injectReload = require("gulp-inject-reload");
var autoprefixer = require('gulp-autoprefixer');
var sourcemaps = require('gulp-sourcemaps');
var connect = require('gulp-connect');
var open = require('gulp-open');
var paths = {
uisource: "UI",
builddestination: "Build",
uisourcecontect: "content",
uisourcescss: "scss",
builddestinationcontent: "content"
};
var pipes = {};
gulp.task('watch', function () {
console.log("Watch for Changes");
gulp.watch(paths.uisource + '/html/index.html', ['movehtml']);
gulp.watch(paths.uisource + '/content/*.css', ['minifycss']);
gulp.watch(paths.uisource + '/scss/*.scss', ['sass']);
gulp.watch(paths.uisource + '/js/*.js', ['minifyjs']);
gulp.watch(paths.uisource + '/fonts/*.+(ttf|ttc|pfb|pfm|otf|eot|svg|woff|woff2|pfa|afm|dfont)', ['movefont']);
gulp.watch(paths.uisource + '/images/*.+(png|jpg|jpeg|gif|svg)', ['optimizeimage']);
})
gulp.task('movefont', function () {
console.log("Moving all fonts in Fonts folder");
return gulp.src(paths.uisource + '/fonts/*.+(ttf|ttc|pfb|pfm|otf|eot|svg|woff|woff2|pfa|afm|dfont)')
.pipe(gulp.dest(paths.builddestination + '/fonts/'))
.pipe(connect.reload());
})
gulp.task('minifyjs', function () {
console.log("Minify Js files");
return gulp.src(paths.uisource + '/js/*.js')
.pipe(gulpIf('*.js', uglify()))
.pipe(rename({
suffix: '.min'
}))
.pipe(gulp.dest(paths.builddestination + '/js/'))
.pipe(connect.reload());
})
gulp.task('minifycss', function () {
console.log("Minify Css files");
return gulp.src(paths.uisource + '/content/*.css')
.pipe(cssmin())
.pipe(rename({
suffix: '.min'
}))
.pipe(gulp.dest(paths.builddestination + '/content/'))
.pipe(connect.reload());
})
gulp.task("movehtml", () => {
console.log("Moving HTMLs to Build/Production Server With Auto Injecting CSS and Js files");
var userScripts = pipes.devGetAndCopyValidatedUserScripts();
var userCss = pipes.devGetAndCopyValidatedCss();
return gulp.src(paths.uisource + '/html/*.{html,htm}')
.pipe(inject(userScripts, {
relative: true,
name: 'bower'
}))
.pipe(inject(userCss, {
relative: true,
name: 'inject'
}))
.pipe(injectReload())
.pipe(gulp.dest('.'))
.pipe(connect.reload());
})
pipes.devGetAndCopyValidatedUserScripts = () => {
return gulp.src([paths.builddestination + '/js/*.min.js']);
}
pipes.devGetAndCopyValidatedCss = () => {
return gulp.src([paths.builddestination + '/content/*.min.css']);
}
gulp.task('connect', function () {
console.log("Connect to the Server");
connect.server({
root: ".",
port: 8888,
livereload: true
});
})
gulp.task('open', function () {
console.log("Open index.html on Localhost");
gulp.src('index.html')
.pipe(open({
uri: 'http://localhost:8888/'
}));
})
gulp.task('optimizeimage', function () {
console.log("Optimize Image files");
return gulp.src(paths.uisource + '/images/*.+(png|jpg|jpeg|gif|svg)')
// Caching images that ran through imagemin
.pipe(cache(imagemin({
interlaced: true
})))
.pipe(gulp.dest(paths.builddestination + '/images/'))
.pipe(connect.reload());
})
gulp.task('sass', function () {
console.log("Convert Sass to CSS files");
return gulp.src(paths.uisource + '/scss/*.scss') // Gets the styles.scss file
.pipe(sourcemaps.init()) // Initialize sourcemap plugin
.pipe(sass()) // Passes it through a gulp-sass task
.pipe(autoprefixer()) // Passes it through gulp-autoprefixer
.pipe(sourcemaps.write()) // Writing sourcemaps
.pipe(gulp.dest(paths.uisource + '/content/')) // Outputs it in the content folder
.pipe(cssmin())
.pipe(rename({
suffix: '.min'
}))
.pipe(gulp.dest(paths.builddestination + '/content/'))
.pipe(connect.reload());
})
gulp.task('delete', function () {
console.log("Delete files");
return del.sync(paths.uisource + '/*.+(ttf|ttc|pfb|pfm|otf|eot|svg|woff|woff2|pfa|afm|dfont|html|htm|css|js|png|gif|jpg|jpeg|svg)')
})
gulp.task('clearcache', function (callback) {
console.log("Clearing all Cache from Local Machine");
return cache.clearAll(callback)
})
gulp.task('default', function () {
runSequence(['delete', 'clearcache', 'minifyjs', 'minifycss', 'optimizeimage', 'movefont', 'movehtml', 'connect', 'open', 'watch'])
})
Now Open your cmd (Command Prompt), go to Project Path where your gulp file is located. Type gulp or gulp default in cmd.
Our gulp file runs like this....

Now, your final Deployment Build is ready.
Our final Project Structure looks like this....
Guys, now you have now leveled up by knowing how to deal with Gulp.
I am attaching whole Project Source Code along with the package.json file.Thus, you don't need to download any dependencies which require running gulp file.


