Showing posts with label Open Source. Show all posts

Wednesday, March 1, 2017

Read WhatsApp Web DOM Elements Using Chrome Extension

A Chrome extension gives Image Paths and Captions of Images which are posted in a WhatsApp Group.

Writing a Chrome extension can be a bit tricky initially, due to its API and the way you have to structure your code. 


WhatsApp Web


In this post, I want to show how you can write a simple extension that reads the Dom Elements of the WhatsApp Web page once it’s loaded. The whole lot is in Javascript, which gives you easy access to the DOM.

Features of Chrome Extension (Information Display in Console)
  • Image Paths are displayed.
  • Image Captions are displayed.
  • The Image who has no caption to display, for that "No Caption" Text is displayed.
  • Image Paths and Captions are displayed in a consecutive manner. So that End User can easily find out the Caption with respect to the Image.
Architecture of an Extension

  • Background page - not visible by the user. A long running script that handles the state of your extension. Communicates with other parts of the extension with messaging.
  • Event page - the same as a background page, but only executes in response to events you define. Preferred to background pages as they are less resource intensive.
  • Options page - UI page that allows a user to set options. An HTML page that references javascript files.
  • Browser actions/page actions - an icon either in the extension bar or the Omnibox respectively. Clicking on the icon will show an UI tab which is an HTML page that can reference javascript. These pages cannot communicate with the website resources/DOM, it needs to message the content script to do that.
  • Content scripts - javascript only. What is used to modify the page itself? The only part that can access and modify the DOM but not code loaded by the website. Files are run once for each page that matches the manifest. All the JS files in the list are loaded so you can use libraries just by including it. This is what we’ll use for our extension.
There are plenty more elements that can be used in an extension, but this list covers the core that will get most of your extension built and most other parts are for specific tasks.
Permissions
When users see ‘This extension can see and modify data on all pages’, they get nervous. So it’s best to limit where your extension will be active by explicitly setting permissions in the manifest.
You’ll also need to specify what pages your content scripts will match and run on. 
[manifest.json]
"permissions": [
    "tabs", "http://www.google.com/*"
  ],
Writing your own extension
Let’s start with the manifest. We need to state which version it is, if you’re uploading a new version to the web store, the version number must be greater than the existing one. Don’t confuse this with the manifest_version, which is always 2 and is not extension specific.
Create a new folder called ‘WhatsAppWeb’ then a new file called ‘manifest.json’ inside it and copy the following into it.
[manifest.json]
{   "manifest_version": 2,
     "name": "WhatsAppWeb",
    "description": "This extension gives Image Paths and Captions of Images which was Posted in a WhatsApp Group.",
    "version": "1.1",
    "icons": {
    "16": "daisy_16.png",
    "48": "daisy_48.png",
    "128": "daisy_128.png"
    },
    "content_scripts": [
        {"matches": ["https://web.whatsapp.com/*"],
            "js": ["jquery-2.2.0.min.js", "whatsappweb.js"],
            "run_at": "document_end" } ] 
}
You must supply 3 icons in sizes 16, 48 and 128 px. These are used on the extension page and the toolbar.
You can now load your extension into Chrome. Go to Window -> Extensions to open the extensions page. Tick developer mode on the top right which allows you to load your own extensions. Click the ‘Load unpacked extension’ button and then select the ‘WhatsAppWeb’ directory. You should now have something that looks like this:

To modify a page we need a content script. Now save a new file called whatsappweb.js and the following as the content:

[whatsappweb.js]

document.addEventListener("DOMNodeInserted", function (event) {
    var tempHTML = "<html>" + $("html").html() + "</html>";
    loadData();
});

function loadData() {
    var images = [];
    var caption = [];
    
    $("#main .message-list .msg .bubble-image img").each(function () {
        images.push($(this).attr('src'));
    })
    console.log(images);
    
    $("#main .message-list .msg .bubble-image").each(function (i) {
        if ($(this).children('.image-caption').length > 0 &&      $(this).children('.image-caption').length !== 'undefined') 
 {
         caption.push($(this).children('.image-caption').children('.emojitext').text());
        } 
        else {
          caption.push("No Caption");
        }
    })
    console.log(caption);
}

Go back to the extensions page and hit reload or press Ctrl + R (this is very important. If you ever wonder why nothing changed even though you updated the code this is probably the reason).

Go to a WhatsApp Web. Use WhatsApp on your phone to scan the code. Once you have done with it, your WhatsApp screen will be visible on your Desktop/Laptop Screen. 

Create a dummy group says for example "Test", add some participants in it. Now post a couple of images with captions as well as without captions in the same group. Ask Group Participants to post the same. 

Now press an F12 key, go to Console Tab. You get the following output.


Image Paths and Captions are displayed in a sequential manner. So that End User can easily find out the Caption with respect to the Image.

In this way, you can read WhatsApp Web Dom Elements Using Chrome Extension. I am attaching Source Code for your reference.

Source Code

Happy learning..:)


Sunday, January 1, 2017

Play With Sass Using Compass - An Opensource CSS Authoring Framework

Sass is an extension of CSS3 which adds nested rules, variables, mixins, selector inheritance, and more. Sass generates well formatted CSS and makes your style sheets easier to organize and maintain. Compass uses Sass. Compass is a Sass framework, designed to make the work of styling the web smooth and efficient. Much like Rails as a web application framework for Ruby, Compass is a collection of helpful tools and tested best practices for Sass. 

Once you finished with the installation of Ruby Germs and Sass on your system, install compass in the next step. If you've not yet installed Ruby Germs and Sass on your system, please refer my following blog for installation:

Install SASS on Windows Using Ruby Gems

Now we are going to install Compass.

Open command prompt (CMD) and type the following command.


It will install Compass on your system. You will get the following message after installation of Compass.


Next we are going to install css parser. 


It gives a count of the Sass rules, properties, mixins defined and mixins used as well as the CSS rules and properties that get output from your Sass-style sheets.   

After installation, it will give you the following message:


Now we are going to create one sample project.
 
You can create project using the following command:
 

After creation of project, you will get the following message.

In the next step, you have to compile Sass to css. So for that purpose, you have to add watch as in the following screenshot:

Once the watch is started, you will get the following message.
 

This kind of folder Structure is created once you create project.


Now, we are writing some Sass code and will send its impact on css file using Compass. 
I use Atom Editor (Open Source) for making this project. You can even use Notepad++, Sublime Text, etc for developing project.

You will see config.rb file in your project.
   
You can see all the references to the different directories Compass will need in order to compile your CSS. 

Now I am going to write some Sass code in screen.scss file.


After saving the complete code, changes will be reflected to css file as well as on command prompt. This could happen because of Compass.

style.css looks like the following:


I hope this quick tutorial made your Compass working environment possible.


Tuesday, November 1, 2016

Atom (Open Source) - A hackable text editor for 21st Century


Atom is a free and open-source text and source code editor for OS X, Linux, and Windows. It provides support for plug-ins written in Node.js, and embedded Git Control, developed by GitHub.

You can visit official site of Atom on below link:


You can easily download Atom from below link. It’s Open Source Text Editor.

1. Cross Platform Editing
Atom can work on any OS like Windows, Linux or OS X.

2. Built In Package Manager
You can search and install new packages. Even you can create your own.

3. Auto completion
Atom automatically completes your code once you write starting character or a word.

4. File System Browser
You can easily browse single file, multiple files or even whole project at a time.

5. Grammar Selection
You can set grammar selection according to file type so that proper color identification and intelligence can get from Atom.


Atom is a desktop application built using web technologies like HTML, CSS, Javascript and Node.Js. Atom is based on Electron (formerly known as Atom Shell), a framework.

Atom also enables cross-platform desktop applications using Chromium and io.js, which is also developed by GitHub. It is written in Less and CoffeeScript. 

Atom can also be used as an IDE. Atom was released from beta, as version 1.0, on June 25, 2015.Its developers call it a "hackable text editor for the 21st Century".


Saturday, October 1, 2016

Widely Used Plugins/Extensions of Brackets

Bracket is a modern, open source text editor that understands web design. It's a lightweight, powerful and modern text editor. They blend visual tools into the editor so we get the right amount of help when we want it. For Example: Photoshop.

With focused visual tools and preprocessor support, Brackets is a modern text editor that makes it easy to design in the browser. It's useful for web designers and front-end developers.

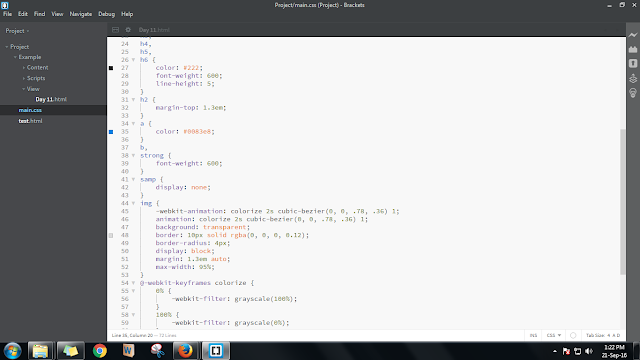
Brackets Screen:


The best feature of this application is to preview your live code changes on the browser with a single click. In this application, there is a button named ‘Live Preview”, which is used to view the live changes on browser by single click on this button. Even it provides better intelligence for HTML tags, CSS, JavaScript, j Query and many other framework. It also provide auto feature for code indentation, alignment, syntax error highlighting etc. There are n number of plugins available in the market which is easily plug-in and help the developers to code it with an ease.
 
Widely Used Plugins/Extensions of Brackets 

 * Angular Js Code Hints  

It provides hint for Angular JS elements like ng-include, ng-view and attributes such as ng-class, ng-controller, ng-app. You can download it from https://github.com/sirajc/Brackets-AngularJS-CodeHints/


 * Auto Brackets

When you write { , [ or ( and press enter, closes the tag and leaves the cursor in the middle line with correct indentation.You can download this extension from https://github.com/beldar/Auto-Brackets

* Auto Prefixer

It automatically adds vendor prefixes in the Css when necessary.The automatic mode is used by toggling "Auto prefix on save" on in the Edit menu.This will process the whole file each time the document is saved and add and/or remove vendor prefixes where appropriate.For more control over where prefixes are added and removed a piece of code may be selected and processed by clicking "Auto prefix selection" in the Edit menu.Only the selected part of the document will be processed.You can download it from https://github.com/mikaeljorhult/brackets-autoprefixer

* Auto save Files on Window Blur

Auto save all open files when switching away from the Brackets editor, in the style of PHPStorm/WebStorm.You can download it from https://github.com/martypenner/brackets-autosave-files-on-window-blur

 * Beautify

Brackets Beautify can be run manually on the whole file or on a selection. Use the Toolbar Button with the wand icon, the menu entry Edit > Beautify, the context-menu entry Beautify, or one of the keyboard shortcuts Ctrl-Alt-B (Windows/Linux), Ctrl-Shift-L (Windows), Cmd-Shift-L (Mac), or define your own. Alternatively it can be enabled to run automatically on save. Use the menu entry Edit > Beautify on Save or the more advanced settings to activate.You can download it from https://github.com/brackets-beautify/brackets-beautify

* CSS Color Preview 

It previews the colors within CSS file.You can toggle the enabled of this extension from the view menu.You can download it from https://github.com/cmgddd/Brackets-css-color-preview 


* Detect Indentation

Brackets Extension to detect the indentation used in the current file and set your editor settings accordingly.You can download it from https://github.com/hirse/brackets-detect-indentation

* Brackets Snippets (by edc)

You can add customize snippets to your Brackets Editor.Even you can use Snippet Library to find awesome snippets.

Snippet Manager


Snippet Library


 You can download it from https://github.com/chuyik/brackets-snippets

* Working File Tabs  

Enable working files list in Sidebar to show as tabs.


You can download it from https://github.com/demonmhon/brackets-working-file-tabs

* Duplicate Files and Folders

An extension for Brackets that provides the duplicate functionality to duplicate files and folders in the project view.

Duplicate - Right click on a file or folder in the project view and select "Duplicate" from the context menu.

Copy or Move - Right click on a file or folder and select "Mark" to mark the file/folder to be copied or moved. Then right click on a file or folder at your desired destination and then select "Move to Here" or "Copy to Here". You can download it from https://github.com/torinpascal/brackets-duplicate-extension

* Extract For Brackets (Preview) 

Preview of Extract functionality inside Brackets. Extract design information and assets from a design comp via contextual code hints for CSS. 

 * FuncDocr

A brackets extension to generate JS/PHP Documentation for your functions. 
  • Open a JS or PHP file
  • set your cursor on a function declaration 
    • function cool(stuff)
  • Use the ShortCut Ctrl-Alt-D (Win) or Ctrl-Shift-D (Mac) to start the documentation or /** + Enter


You can download it from https://github.com/wikunia/brackets-funcdocr 


* Indent Guides 

A Brackets extension to show indent guides in the code editor.Toggle the extension with View > Indent Guides. 


 You can download it from https://github.com/lkcampbell/brackets-indent-guides 

* More HTML Code Hints

Extends HTML code hints with more HTML5 elements and attributes such as picture, srcset, inputmode as well as HTML4 elements such as cellpadding, cellspacing and iframe. You can download it from https://github.com/coliff/Brackets-HTML5CodeHints/

* Paste and Indent 

Automatically apply the correct indentation to pasted text. You can download it from https://github.com/ahuth/brackets-paste-and-indent 

* Reasonable Comments 

Simple enhancements for typing block comments in Brackets. When you press Enter, the next line is automatically prefixed with a properly indented "*". You can download it from https://github.com/peterflynn/reasonable-comments

Whitespace Normalizer

It trims trailing white spaces, transforms tabs to spaces and ensures newline at file end. You can download it from https://github.com/dsbonev/whitespace-normalizer

* Sftp Upload

Steps to Upload a File:

  • Open Extension Manager by clicking the building-block icon on the right side of Brackets;
  • Search for sftpupload;
  • Click Install;
  • Click the up-side arrow icon (on the right) to open the panel;
  • Navigate to your project, click "Server Setup" button and fill in your server info;


Now you can right-click on the files in your project, use Upload via SFTP to upload it to your server
  • If you change and save a file within the project, it will show up in the bottom panel; you can click "Upload" to upload this file, "Skip" to skip a single file, or "Upload All" to upload all changed files to the server.
  • Shortcuts:
    • (Ctrl-Alt-U / Cmd-Alt-U) to upload the current opening file;
    • (Ctrl-Shift-U / Cmd-Shift-U) to upload all changed files;
    • (Ctrl-Alt-Shift-U / Cmd-Alt-Shift-U) to open up Upload panel.
 Now you have got better knowledge about various extensions of Brackets.

Happy learning....!!